Enrolling Endpoints
Enrolling Windows Devices
Backing up Data
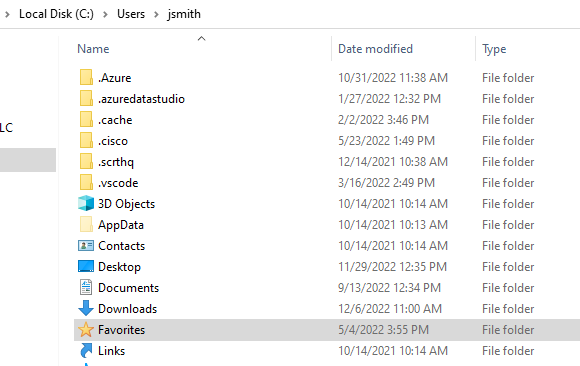
If the PC being onboarded is already connected to a domain, be sure to back up any data stored locally (c:\users\username) - as that data will not be present in your new Azure AD profile. This data can be backed up to a local folder on C:\ for onboarding, or your new OneDrive. Common folders include the c:\users\username\desktop and c:\users\username\documents folders. To backup Favorites from a web browser, most are stored in c:\users\username\Favorites file. Copying that file to the same location in your new profile should make them appear in your Internet Explorer / Edge. For 3rd party browsers, refer to their documentation.
Important Note: To prevent locking yourself out of Windows, create a local administrator account before disconnecting from your corporate domain, if applicable.
Azure AD join a brand new Windows device
For your devices that that are brand new and fresh out of the packaging, follow the steps below to onboard your device into Azure AD.
- Choose your language.
- Choose Country / Region.
- Choose keyboard layout.
- Connect to WiFi if applicable, otherwise be sure that your Ethernet cord is plugged in with an active internet connection.
- Allow Windows setup to check in with MS and download / apply any updates.
- Review the Microsoft License Agreement and click “accept” if you accept the terms and conditions.
- Name your device - (skip for now is an option).
- Choose set up up for work or school, and click Next.
- Enter credentials & authenticate with Multi-Factor Authentication, or if this is a new account, configure your Multi-Factor Authentication options.
- Review and customize your privacy settings, and click on Accept when you are finished.
- Allow Windows to Update.
- Wait while your device downloads and implements your company’s configuration profiles and compliance policies, and then reboots into Windows.
- Configure WHFB (default is a Biometric and a PIN) - and verify your identity with your Microsoft Azure AD credentials and MFA.
- Upon completion, your device will be onboarded into Azure AD and AutoPilot.
Azure AD join a device that has been prepared via AutoPilot
For your devices that that have been configued by AutoPilot, and are waiting for a new user to login, follow the instructions below:
Onboarding when a PC has been freshly AutoPilot Reset
- Once updates complete, you will be prompted with a Windows login screen.
- Login with your Azure AD credentials. Windows will begin to download configuration profiles and compliance policies while preparing your profile.
- You will be prompted to configure Windows Hello & MFA. The default baseline requirements for Compliance as a Service require a biometric and a PIN be configured. Once you login to Windows, be sure to visit your sign-in options to add your secondary factor. You will also be asked to enter your Azure credentials and login with MFA (SMS/etc), or if this is a new account you may be prompted to configure MFA.
Azure AD join an existing device from outside of Azure
The instructions below detail how to join a Windows 10 workstation to Azure AD to enroll with Microsoft Endpoint Manager (Intune) that was not joined to another AD.
Important Note: In some situations you may receive an error when trying to join Azure AD. If this occurs, please disconnect from the existing corporate domain and join the PC to a workgroup prior to Azure AD joining. Be sure you have created a local administrator account before disconnecting the corporate domain to prevent being locked out.
- Log into Windows 10 with a local administrator.
-
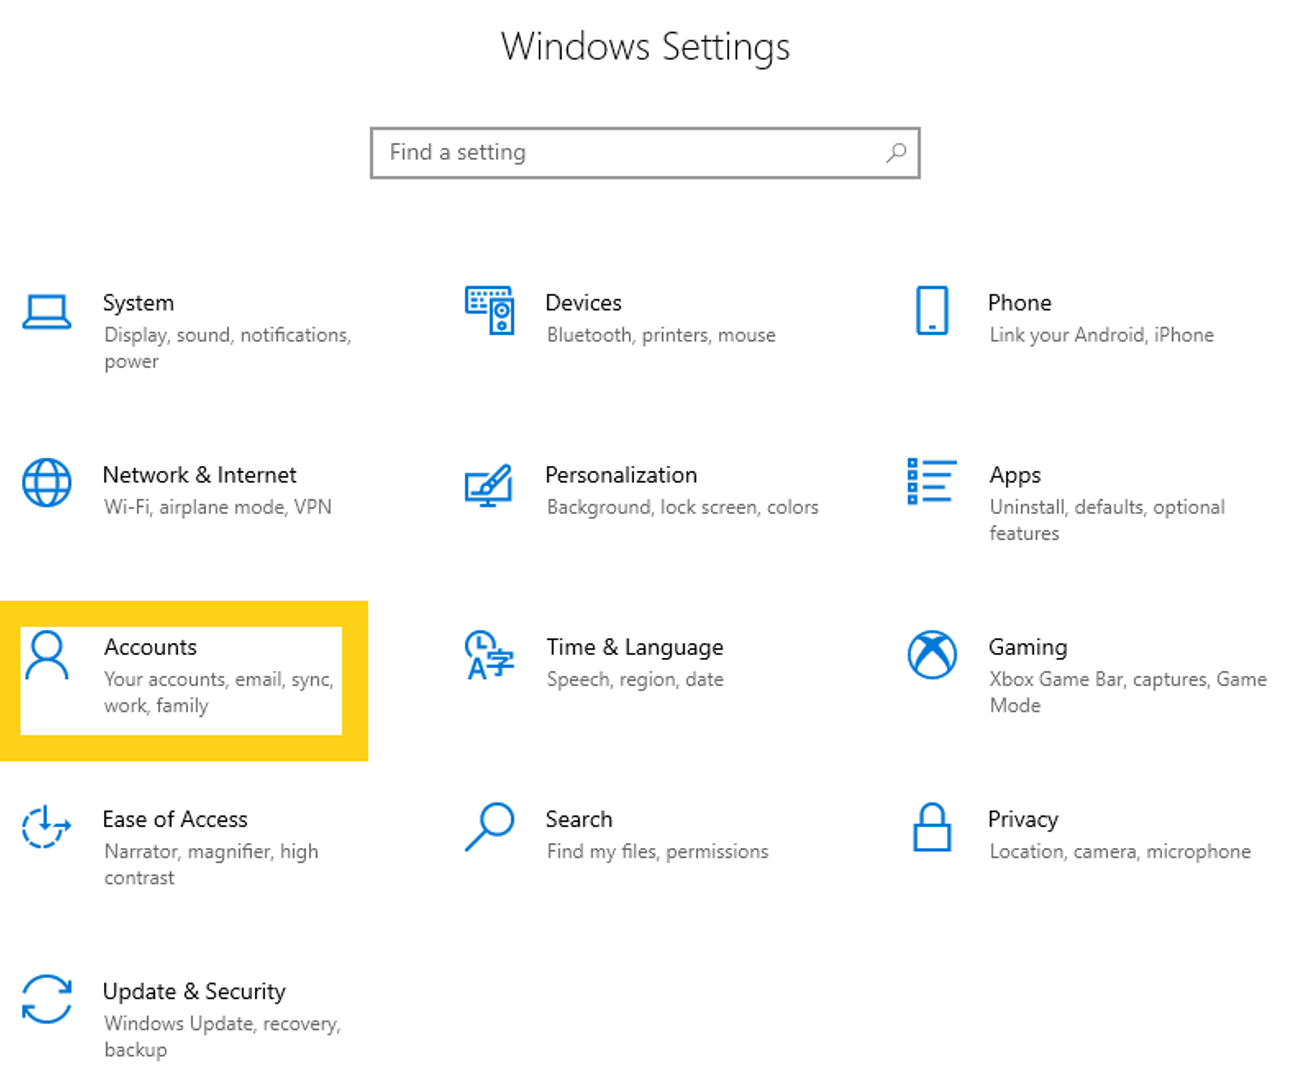
Click Start > Settings > Accounts
-
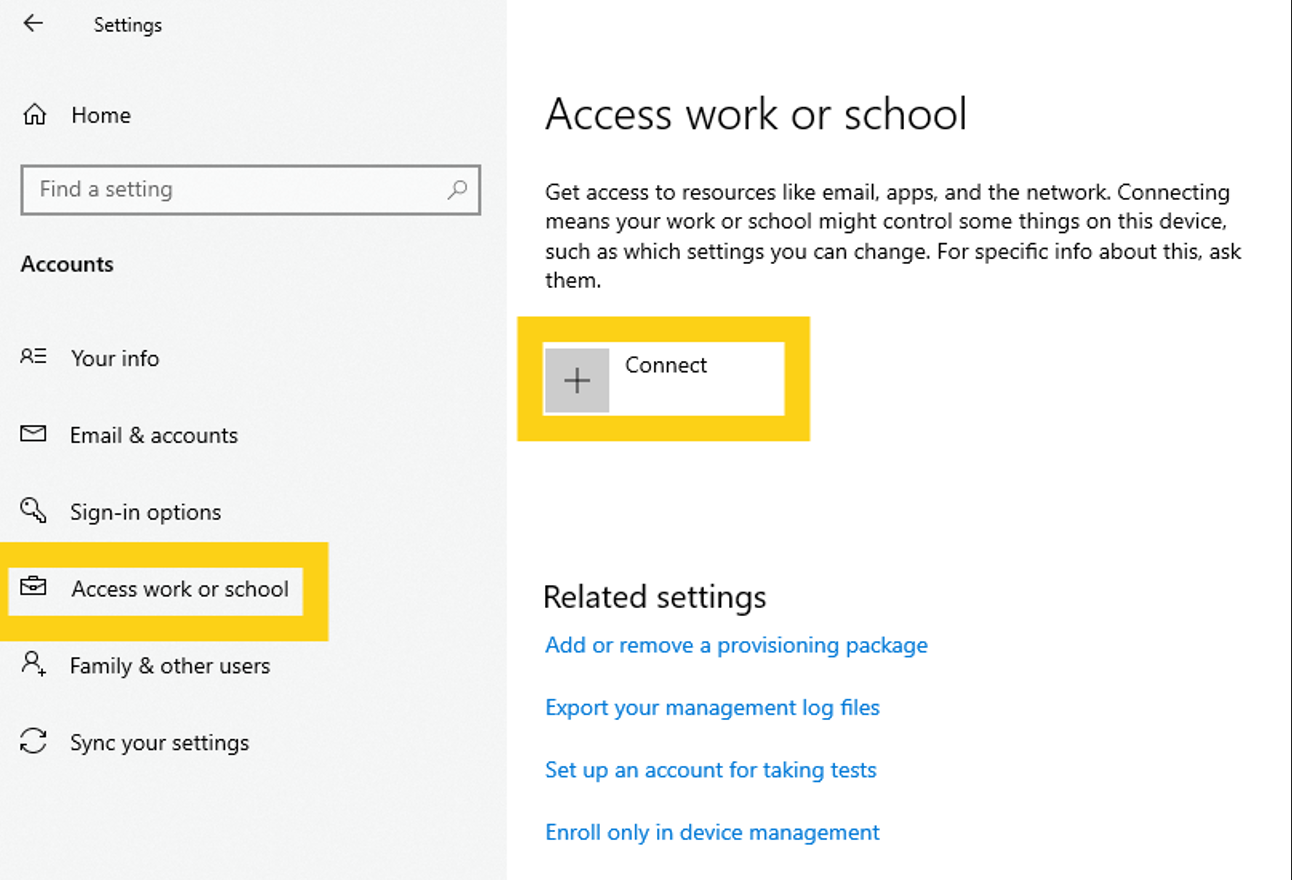
Click on Access work or school, and then [ + ] Connect.
-
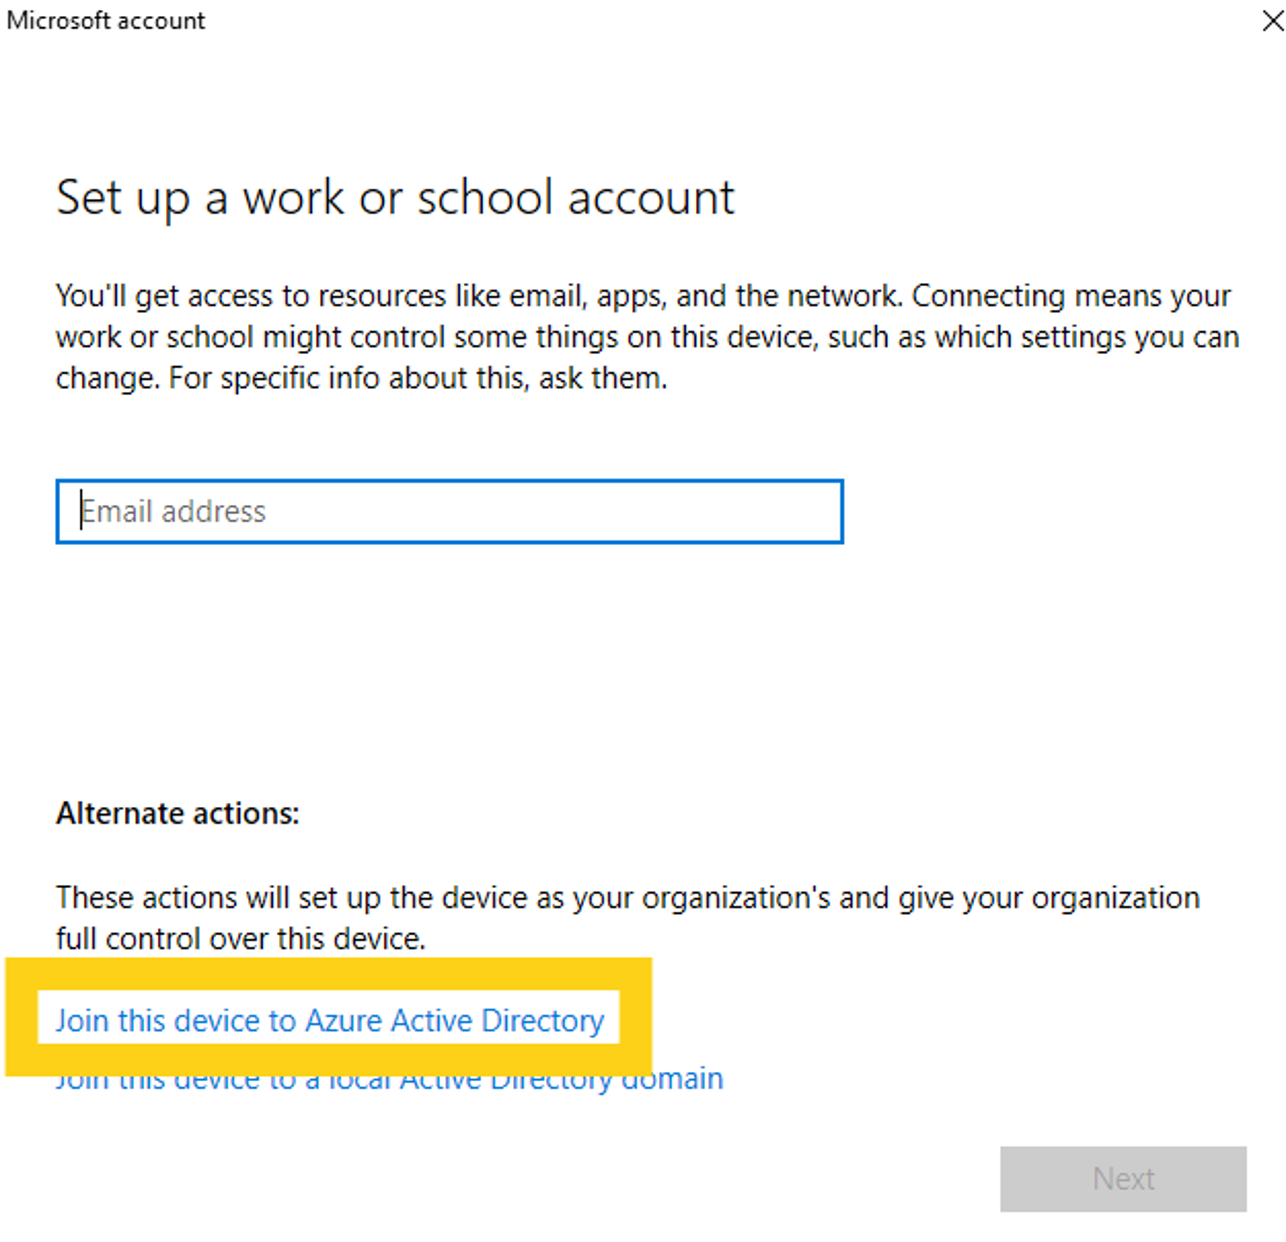
Choose Join this device to Azure Active Directory and enter your Azure AD credentials.
- Follow on-screen prompts to complete configuration & domain join.
Important Note: Once you join Azure AD & reboot your PC, any device configuration profiles and policies that are assigned to your user will begin to propagate and be implemented on your device.
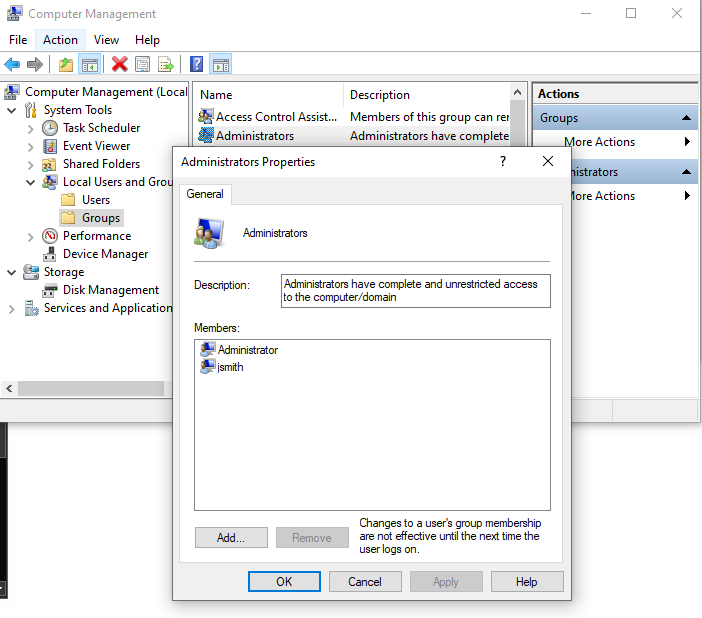
- Remove the user ID that was used to join the domain from the Local Administrators group:
• Click Start, and begin typing “Computer Management” – and then click to open it when the result displays.
• Go into “Local Users and Groups”
• Go into Administrators
• Remove your ID from this group, and reboot the laptop.
Azure AD join an existing device from commercial Azure
For your devices that are joined to the commercial Azure AD please follow the steps below:
- Back up all data as the current profile will no longer be accessible to non-administrators after migration. Theoretically it does still reside in the c:\users\username folder, but we still recommend backing up to OneDrive.
-
Create a local administrator account. This can be done by going to Control Panel > Administrative Tools > Computer Management > Users. Right click in a blank spot, click on “New User” – and identify the user. I recommend setting the password to never expire.
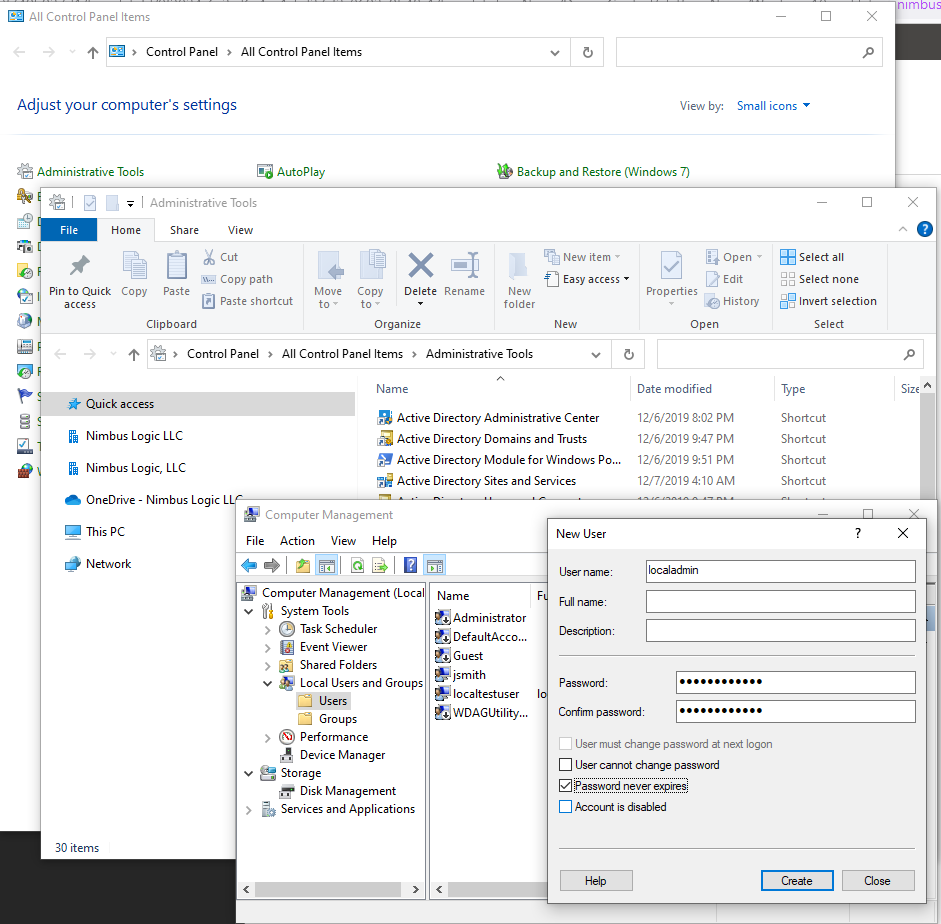
-
In Computer Management, go to “Groups” – and add the user you just created to the “Administrators” group.
- Reboot the PC and log in as the new admin user you just created.
-
Click Start > Settings > Accounts

- Go to “Access work or school” – and click where it says “Connected by username; Connected to [Tenant] Azure AD” and choose “Disconnect.” Confirm and reboot.
- Log back in as the admin that we created, and follow the instructions from our website to join Azure AD:
Azure AD join from outside of Azure - Reboot, login as username@[Tenant].com
Windows Hello For Business - MFA
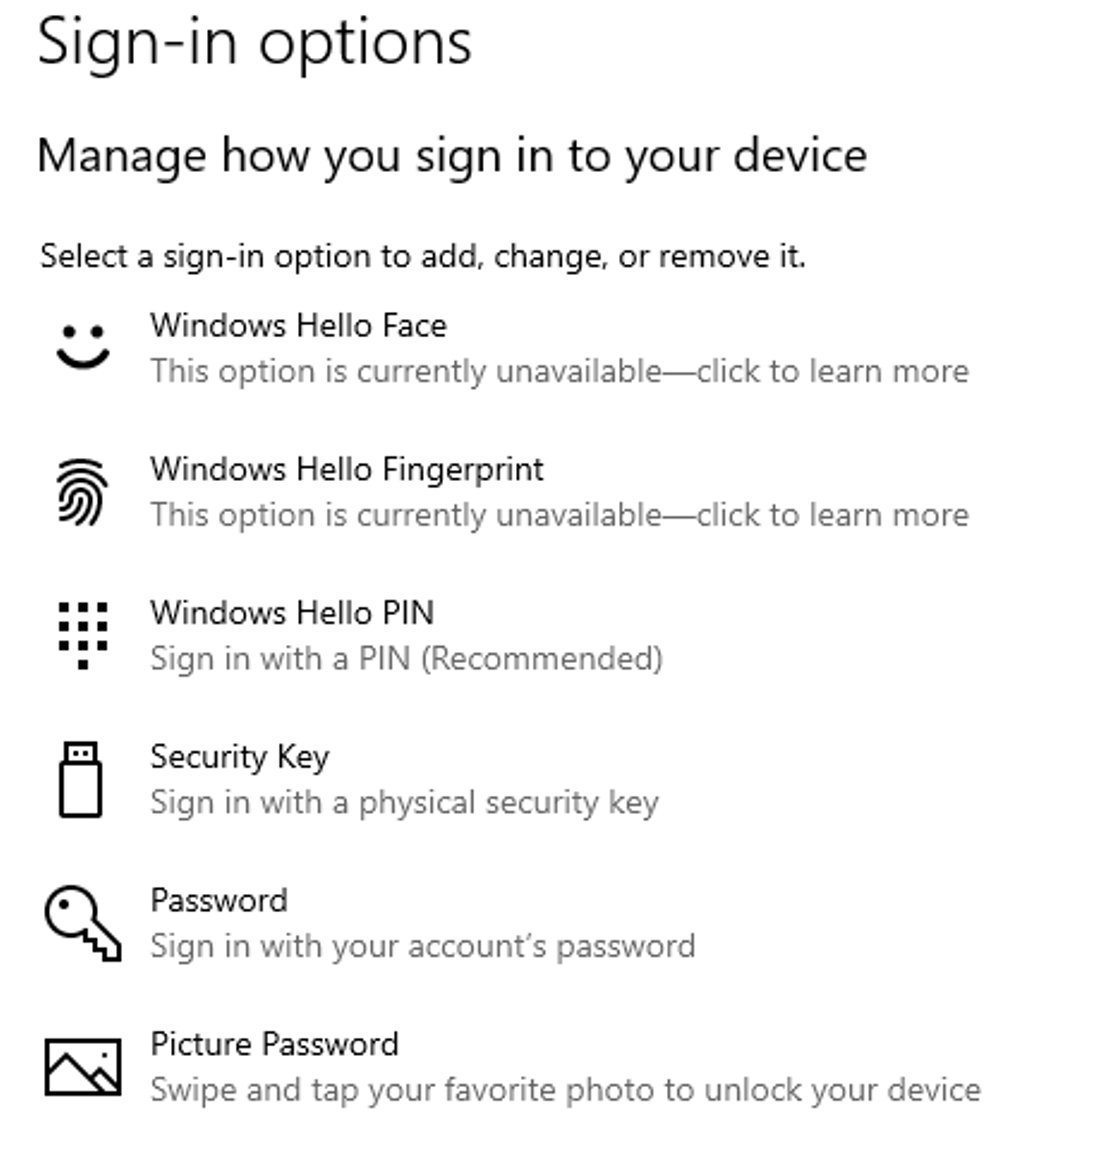
Upon login you should be prompted to configure Windows Hello for business. Follow the on-screen instructions to set up a minimum of two factors, including but not limited to biometrics when available (fingerprint / facial recognition) and PIN.
Important Note: : If you are not prompted to configure WHFB, click on Start > Settings > Accounts > Sign-in Options. Here you can configure an additional MFA option for your second factor in Windows Hello for Business.
It’s also recommended to pair your smartphone with the device’s Bluetooth connection as a secondary factor of authentication.
To do this, click on Start > Settings > Devices > Add Bluetooth or other device
Important Notes:
Unless using a Smart Card or Security Key, the first MFA factor must be PIN, facial recognition, or fingerprint. The second factor will be either a trusted signal, or a PIN (if not used as first factor). If logging in with a Security Key, the key itself, plus pressing the security key activation button, in conjunction with the PIN satisfy the MFA for Windows login.
Notify your CSP once all users have configured Windows Hello for Business so that MFA enforcement can be enabled.
Enrolling Mac Devices
Step 1: Download the Company Portal App
- Open the App Store on your Mac device.
- Search for “Intune Company Portal.”
- Download and install the app.
Step 2: Enroll in Intune
- Open the Company Portal app.
- Sign in using your corporate email address and password.
- Follow the on-screen prompts to enroll your device. You may be asked to install a management profile.
Step 3: Confirm Enrollment
- After the enrollment process completes, your device will appear in the Company Portal app.
- You can now access company resources from your Mac device.
Enrolling Mobile devices
Users may be prompted to provide MFA through Microsoft Authenticator when signing into the Company Portal. It is recommended to have this installed and configured prior to enrolling mobile devices.
Android Device Enrollment
When enrolling BYOD (Bring Your Own Device) Android devices, a work profile is created to store all orginzational data. This data is kept separate from personal data. Personal data cannot be accessed by the orginization through the work profile.
Please ensure that users remove their managed account from any native email client and from any Outlooks versions downloaded from the personal app store.
Remember that once the device is enrolled, your company can manage corporate data but will not have access to your personal data. If necessary, the company can selectively wipe corporate data without affecting your personal information.
Step 1: Download the Company Portal App
- Open the Google Play Store on your Android device.
- Search for “Intune Company Portal.”
- Download and install the app.
Step 2: Enroll in Intune
- Open the Company Portal app.
- Sign in using your corporate email address and password.
- Follow the on-screen prompts to enroll your device. You may be asked to activate device administrator permissions or work profile.
Step 3: Confirm Enrollment
- After the enrollment process completes, your device will appear in the Company Portal app.
- You can now access company resources from your personal Android device.
iOS Device Enrollment
Step 1: Download the Company Portal App
- Open the App Store on your iOS device.
- Search for “Intune Company Portal.”
- Download and install the app.
Step 2: Enroll in Intune
- Open the Company Portal app.
- Sign in using your corporate email address and password.
- Follow the on-screen prompts to enroll your device. You may be asked to install a management profile.
Step 3: Confirm Enrollment
- After the enrollment process completes, your device will appear in the Company Portal app.
- You can now access company resources from your iOS device.
App protection Policies
App Protection Policies play a critical role in ensuring the security of corporate data on BYOD mobile devices. They are a part of Microsoft Intune’s Mobile Application Management (MAM) feature set and help organizations protect sensitive data while allowing employees to use their personal devices for work. Here’s how App Protection Policies impact BYOD mobile devices:
-
Data Protection:
App Protection Policies define how corporate data is handled within managed applications on the mobile device. They can enforce data protection mechanisms such as data encryption, copy-paste restrictions, and controls over data sharing between managed and unmanaged applications. This ensures that even if a device is lost or an employee leaves the company, corporate data remains protected and isolated from personal apps and accounts. -
Secure Access to Corporate Data:
App Protection Policies allow employees to securely access corporate data from managed applications on their BYOD devices. These policies can prevent data leakage, unauthorized access, and protect against potential security threats. -
Controlling Data Movement:
App Protection Policies enable organizations to control the movement of corporate data within managed applications. This includes restricting data transfer between managed and unmanaged applications, such as preventing users from saving sensitive company information to personal cloud storage accounts or forwarding emails to personal email addresses. -
Remote Wipe and Selective Wipe:
With App Protection Policies, administrators can perform selective wipes on managed applications, removing only corporate data while preserving personal data. In case of a security breach or when an employee leaves the company, administrators can remotely wipe the managed applications’ data without affecting personal apps and data on the BYOD device.
App protection policies require devices to set a pin with at least 8 numeric characters. If device pins do not meet this requirement, user’s will be prompted to change their pin.