User Offboarding
Purpose
This SOP outlines the steps for offboarding users into the Microsoft cloud as part of the Compliance-as-a-Service offering. It ensures a structured and secure offboarding process for users while maintaining compliance requirements.
Scope
This procedure applies to all organizations utilizing Compliance-as-a-Service and includes actions for both the Organization seeking certification (OSC) and the External Service Provider (ESP).
Authorized Roles
Reminder: Always review the roles of OSC users to ensure they align with the Authorized Roles. No action should be taken without a request from or approval by a user assigned the appropriate authorized role.
- Authorized Managers
- Global Administrator
- User Administrator
Organization seeking certification (OSC) Steps
Submit User Offboarding request
Requests can be made directly to support@nimbus-logic.us and should include all of the following information.
User Information:
- Username to be offboarded
- Any devices assigned to User
Removing a users licenses will also delete any data associated to that user. If data is needed from a users mailbox or OneDrive, specify in your ticket.
External Service Provider (ESP) IT Team Steps
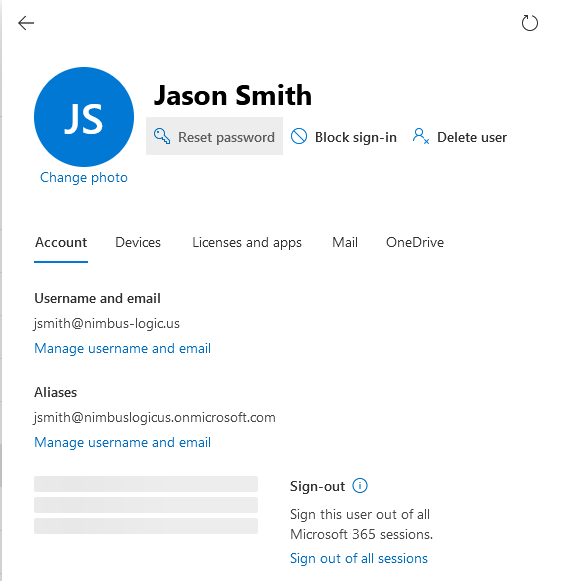
Step 1: Revoke user sessions and block sign-ins from the Admin Center
- Log in to the Entra ID portal using an account with administrator privileges.
- In the left-hand menu, select “Users”, then “Active users” and search for the user you want to offboard.
- Click on the user’s name to open their profile.
- In the user’s profile, click on “Sessions” and select “Sign out all sessions”.
- Next, select “Block sign-in” under the username.
Once the users profile is disabled, only an admin user can access the users local workstation profile by browsing through file explorer.
Allow up to one hour for any existing sessions to be completely logged out, new sign-ins are immediately blocked. Users Mail and OneDrive will remain intact in the event of an audit required
Step 2: Remove user from any assigned roles in Entra ID
- In the Entra ID portal, go to “Users” and select the user you want to offboard.
- In the user’s profile, click on “Assigned roles”.
- Remove the user from any assigned roles by clicking on the “Remove” button next to each role.

Step 3 (Upon request): Convert user mailbox to shared mailbox in Exchange admin center
- Log in to the Exchange admin center.
- In the left-hand menu, select “Recipients”, then “Mailboxes” and search for the user’s mailbox.
- Select the user’s mailbox and click “Convert to shared mailbox”.
- Assign permissions for the shared mailbox to other authorized employees who need access to the user’s emails.

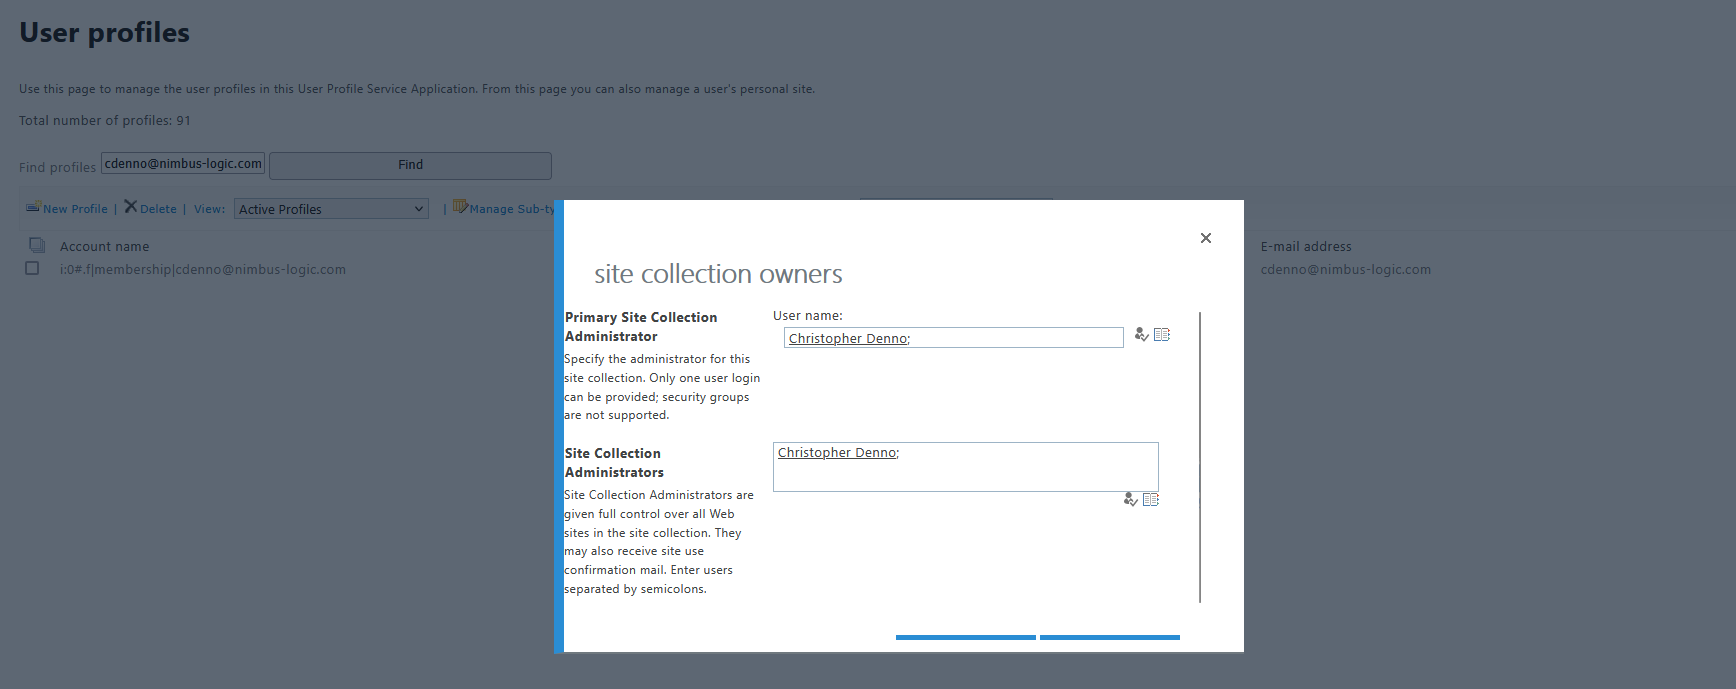
Step 4 (Upon request): Delegate OneDrive access to migrate files
- Log in to the SharePoint admin center.
- In the left-hand menu, select “More Features”, then “Open” under User profiles.
- Under “People”, select “Manage User Profiles”.
- Enter users email address in search box and click “Find”
- Click on Account name and select “Manage site collection owners”
- Assign user needing access to “Site Collection Administrators”.
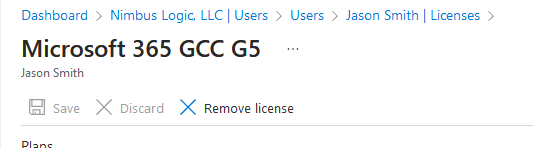
Step 5: Remove license from user in Entra ID
Do not remove the license if access is needed to a user’s OneDrive
- In the Azure portal, go to “Users” and select the user you want to offboard.
- In the user’s profile, click on “Licenses”.
- Select the license assigned to the user that needs to be removed.
- Remove the license assigned to the user by clicking on the “Remove license” button.
Do not remove the user’s license until the mailbox has been converted to a shared mailbox, unless the mailbox is not needed. Removing the license will delete any mailboxes still associated to the user.
Review & Maintenance
This SOP will be reviewed on a quarterly basis or as required by changes in compliance regulations or Microsoft cloud services.